

A painter in a U.S. collision shop usually reaches for a tip size after checking three things: product, panel, and finish target. The wrong nozzle can make a good clear look tight, make primer spray dry, or make a metallic basecoat stripe across a door. A paint gun tip size chart should give more than numbers; it should explain why each range behaves the way it does.
A fluid tip is the exit point that controls how much coating can leave the gun before air cap energy breaks it into droplets. A smaller opening restricts fluid and can sharpen control, but it can also starve a thicker product. A larger opening increases delivery, but it can overload the surface when the coating is thin or the painter moves too slowly.
For professional use, a paint gun tip size chart works best as a technical starting point, not as a universal rule. Product technical sheets, air cap design, shop temperature, reducer speed, gun distance, and painter rhythm all affect the final result. In automotive refinishing, the best tip is not always the biggest one that sprays. It is the size that lets the coating atomize cleanly, lay flat, and flash correctly.

Tip diameter controls atomization and film build rate
The first mistake many painters make is treating the fluid tip as a simple hole size. In reality, it interacts with the needle taper, air cap, fan control, inlet pressure, and the coating’s solids content. A 1.3 mm setup in a high-efficiency gun can behave differently than a 1.3 mm setup in an older conventional gun because air movement around the fluid stream changes droplet breakup.
A practical paint gun tip size chart should separate thin, medium, and heavy materials before naming any model. Basecoat and clearcoat generally need fine atomization and controlled delivery. Sealer needs enough flow to cover evenly without texture. Primer surfacer needs a larger fluid path because it carries more body. Polyester primer and sprayable filler need the largest openings because they are built for filling, not final gloss.
The technical goal is balance. If the tip is too small, the painter compensates by slowing down, increasing fluid, or adding pressure. Each correction can create a new defect. If the tip is too large, the painter may close the fluid knob too much, which can disturb needle response and create an unstable fan. The cleanest setup lets the gun work in its natural adjustment range.
Nozzle choice depends on coating viscosity and solids
Coating viscosity changes with product type, reducer speed, shop temperature, activator, and time in the cup. A low-VOC clear used in a warm Texas booth may not behave like the same category of clear sprayed during a cold morning in Michigan. Viscosity does not only affect whether the product comes out of the gun; it affects how quickly it breaks apart and how the film levels.
This is where a paint gun tip size chart becomes useful for professional judgment. A 1.2 mm or 1.3 mm setup can give beautiful control on thin basecoat and some clears, but it may create a dry, pebbled surface if used on a heavy clear without enough flow. A 1.8 mm setup can make primer surfacer lay down with proper build, but it can flood a sealer if the painter treats it like primer.
Technical data sheets remain the final authority for a specific coating, and trade references such as spray-gun selection basics reinforce the same principle: the gun setup must match the material being sprayed. In the booth, that means checking the coating first, then choosing the tip, then adjusting air and fluid around that choice rather than forcing one nozzle to handle every product.
Core tip ranges for U.S. automotive refinish shops
A professional paint gun tip size chart needs to reflect the products commonly used in U.S. collision refinishing: epoxy primer, primer surfacer, sealer, solvent basecoat, waterborne basecoat, single-stage urethane, production clear, high-solids clear, and smaller touch-up materials. These ranges are practical starting points for gravity-feed automotive spray guns, with final adjustment always tied to the coating system in use.
The table below helps organize common tip sizes by coating type, spray behavior, and professional use case. It is meant for painters who already understand gun distance, overlap, trigger timing, and air supply, so the focus stays on how tip size affects material delivery and finish quality.
| Coating or application | Typical tip size | Professional use | Setup notes |
|---|---|---|---|
| Fine touch-up, small blend, jamb work | 0.8–1.0 mm | Compact repairs, tight edges, small parts | Best with light fluid flow and controlled fan width |
| Small-panel basecoat or bumper spot repair | 1.0–1.2 mm | Bumpers, mirrors, motorcycle parts, narrow blends | Keep pass speed steady to avoid dry edge buildup |
| Solvent basecoat | 1.2–1.4 mm | Panels, blends, metallics, pearls | Use stable air and consistent overlap for flake control |
| Waterborne basecoat | 1.2–1.4 mm | OEM-style refinish and color blending | Air movement and flash control are critical |
| Production clearcoat | 1.2–1.4 mm | Collision clear on panels and full sides | 1.3 mm is often a strong balance for flow and texture |
| High-solids clearcoat | 1.3–1.5 mm | Premium clear, slower flow, larger panels | Match reducer speed and avoid excessive wet film |
| Primer sealer | 1.3–1.5 mm | Wet-on-wet sealing before basecoat | Needs smooth coverage without heavy texture |
| Single-stage urethane | 1.3–1.6 mm | Commercial, restoration, solid color work | Watch gloss control and sag risk on vertical panels |
| Epoxy primer | 1.4–1.7 mm | Bare metal, restoration, corrosion protection | Follow product sheet for induction and reduction |
| 2K primer surfacer | 1.6–1.8 mm | Sandable build before blocking | Larger tip helps body without dry spray |
| High-build primer | 1.8–2.0 mm | Heavy filling, repair shaping, production prep | Use a dedicated primer gun whenever possible |
| Polyester primer or sprayable filler | 2.0–2.5 mm | Maximum build for restoration and shaping | Finish quality is secondary to material delivery |
The key is not memorizing every number. The key is understanding what the number does. A smaller size gives tighter control and lower delivery, while a larger size increases material volume and helps thicker coatings move through the gun. A paint gun tip size chart only becomes reliable when the painter reads those ranges through the product, panel shape, and desired film behavior.
Small fluid tips sharpen clearcoat flow and texture
A smaller fluid tip can make clearcoat easier to control when the product is thin, the panel is small, or the painter wants a tighter wet edge. A 1.2 mm setup can produce excellent texture with certain production clears, but it may require a refined hand because the gun delivers less material per pass. When the painter slows down to compensate, sag risk can return quickly.
For many U.S. refinish shops, a paint gun tip size chart places 1.3 mm near the center of clearcoat work because it offers a useful compromise. It can carry enough fluid for a wet film while still giving clean atomization on modern compliant and high-efficiency guns. A 1.4 mm setup can be excellent for broader panels, higher-solids clears, or painters who move faster and keep a stable distance.
The danger is reading tip size without reading the surface. If clear looks grainy, the answer is not always a larger tip. The painter should first confirm air volume, trigger pressure, reducer speed, booth temperature, gun distance, overlap, and flash behavior. A small tip that is properly supported can create a flatter finish than a larger tip used with weak air or inconsistent technique.
Large fluid tips help primers build without dry drag
Primer surfacer is built for correction, sanding, and filling. It needs enough material to cover repair edges and build a sandable foundation. When a painter tries to spray high-build primer through a 1.3 mm or 1.4 mm tip, the gun often struggles. The fan can appear weak, the surface can look dry, and adhesion or build can suffer because the coating is not reaching the panel in the right volume.

A professional paint gun tip size chart should push 2K primer surfacer into the 1.6–1.8 mm range for most gravity setups, with 1.8–2.0 mm for high-build material. Polyester primer or sprayable filler belongs even larger, often around 2.0–2.5 mm depending on the product. These coatings are not designed to mimic clearcoat texture; they are designed to place material efficiently so the surface can be blocked flat.
A dedicated primer gun is still the cleaner shop habit. Primer residue can hide inside passages, cup threads, and nozzle areas, then show up later as contamination in sealer, basecoat, or clearcoat. A painter who separates primer tools from finish tools protects the final appearance and reduces cleaning risk. This is especially important in busy production booths where gun changes happen quickly.
Air cap design shifts the right fluid tip selection
Tip size cannot be judged alone because the air cap controls how air shapes and breaks up the fluid stream. HVLP caps move a higher volume of air at lower pressure and often feel softer at the surface. HTE or compliant setups can deliver strong transfer with a different atomization feel. MP-style setups may balance speed, efficiency, and pattern stability depending on the gun design.
A paint gun tip size chart should therefore be read as a range, not a command. A 1.3 mm HTE clearcoat setup can behave differently than a 1.3 mm HVLP setup because cap energy, air volume, and pattern shape are not identical. When atomization is strong, the painter may run a slightly larger tip without coarse texture. When the cap is softer, a smaller or more controlled setup may help keep the film clean.
Air supply is part of the same system. A shop can own the right gun and the right tip but still get poor results if the hose, couplers, regulator, filtration, or compressor capacity restrict flow. The reading on a wall regulator does not guarantee that the gun receives stable air under trigger. For deeper technique work, professional spray technique belongs beside tip selection because both affect atomization and film control.
Avalon A60 and A30 setups by refinish material type
In the Avalon lineup available through AVSprayGuns, tip choice should follow the same professional logic: use the larger full-size platform when the work needs coverage, and use the compact platform when the repair needs precision. The Avalon A60 eXtreme is the stronger fit for full panels, clearcoat, basecoat, sealers, and broader refinish work. The A30 Plus format, represented in the store through A-30 Mini touch-up options, is the sharper choice for smaller parts, tight blends, bumpers, jambs, and controlled repair zones.
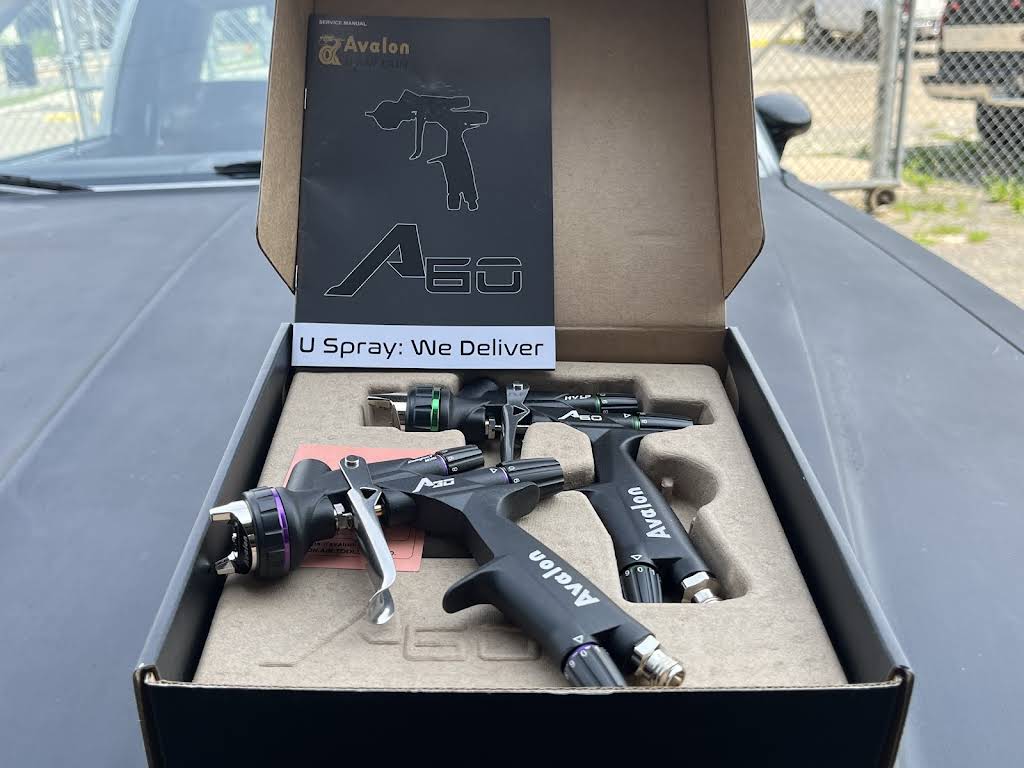
A shop-focused paint gun tip size chart places the A60 eXtreme HTE 1.3 mm and 1.4 mm options in the serious refinish range. The 1.3 mm setup makes sense for basecoat control, fine clear texture, and painters who prefer a tighter fluid load. The 1.4 mm setup suits broader clearcoat work, high-solids material, and painters who move quickly enough to carry a wet edge without flooding the panel.
The A-30 Mini sizes serve a different role. A 0.8 mm setup is appropriate for ultra-fine touch-up and detail work. A 1.0 mm setup fits small panels, narrow blends, mirror covers, and tight color repair. A 1.2 mm compact setup can support bumper spot repair and controlled small-area coating where a full-size gun would feel excessive. The point is not to replace the A60; it is to keep the right fan size in the painter’s hand.
5 checks before final tip selection in the booth
A professional painter should never select a tip by coating name alone. The same category of clear, basecoat, or primer can behave differently across brands, temperatures, reducer choices, and gun platforms. Before locking the setup, these five checks keep the selection technical and repeatable.
- Confirm the coating category and solids level before choosing the nozzle.
- Check the product sheet for approved gravity-feed tip ranges.
- Match the tip to the air cap and available compressor volume.
- Spray a pattern test and inspect center load, horn balance, and edge softness.
- Test the coating on a panel card before committing to the vehicle.
After these checks, a paint gun tip size chart becomes a working tool rather than a shortcut. The painter can choose a logical starting point, test it under real trigger pressure, and correct one variable at a time. That approach is faster than chasing texture, striping, solvent pop, or sagging after the first coat is already on the panel.
Setup errors that create costly refinish booth defects
Most tip-size problems look like application problems at first. A clearcoat that textures may seem like poor overlap, but the tip may be too small for the product and pace. A sealer that lays heavy may seem like slow technique, but the tip may be too large or the fluid needle too open. A metallic basecoat that stripes may come from distance and angle, but fluid delivery can also make the problem worse.
The most common errors include:
- Using a 1.3 mm finish gun for high-build primer and wondering why the primer sprays dry.
- Spraying clear through an oversized tip with slow pass speed and creating heavy texture or sag risk.
- Choosing a compact gun for a large hood, then overlapping too many tight passes across the panel.
- Closing the fluid knob too far to control an oversized tip, which makes trigger response inconsistent.
- Ignoring air restriction at the hose or coupler and blaming the nozzle for weak atomization.
A paint gun tip size chart helps prevent these errors because it connects defect patterns back to material delivery. The painter can ask better questions: Is the product too thick for the nozzle? Is the cap getting enough air? Is the gun delivering more material than the panel can hold? Is the repair area better suited to a compact Avalon A30 format than a full-size A60 eXtreme?

Technique changes after changing the spray tip size
Changing tip size changes the way the painter must move. A larger tip usually needs slightly more discipline with pass speed, trigger timing, and overlap because material arrives faster. The painter may need to move quicker, reduce fluid opening, or increase panel awareness on vertical surfaces. The goal is to keep the film wet and even without creating heavy edges.
A smaller tip changes the job in another direction. The painter may need a slightly slower pass, tighter fan control, or closer attention to dry edges. On metallic basecoat, the smaller setup can sharpen control, but it can also make the painter overwork the panel if coverage is not building evenly. On clearcoat, a small tip can improve texture only when the material still has enough volume to flow.
A paint gun tip size chart should always be paired with a spray-out habit. Test cards reveal whether the setup is producing a clean fan before the vehicle is exposed. A painter can also compare two tips on the same card using the same pressure, distance, and reducer. That simple booth habit often shows which setup fits the coating faster than any guess made at the mixing bench.
Tip selection across basecoat, sealer, and clear
Basecoat selection depends heavily on color control. Solvent basecoat and waterborne basecoat are often comfortable around 1.2–1.4 mm, but metallics, pearls, and tri-coat midcoats demand extra attention. Too much fluid can make metallics float unevenly. Too little fluid can create dry overspray and poor hiding. A balanced 1.3 mm full-size gun is often a strong starting point for color work in a production environment.
A paint gun tip size chart should treat sealer as its own category. Sealer is thinner than primer surfacer but more body-heavy than many basecoats. Around 1.3–1.5 mm is common for wet-on-wet sealing because the coating needs to cover uniformly without creating sanding texture. If sealer lays too heavy, it can trap solvent or disturb basecoat appearance. If it lays too dry, it can leave a rough foundation.
Clearcoat tip selection should follow the painter’s rhythm and the clear’s solids level. A fast painter on large panels may prefer 1.4 mm, especially with an Avalon A60 eXtreme HTE or MP-style setup. A painter chasing tighter texture with a production clear may prefer 1.3 mm. The best result appears when tip size, cap behavior, distance, overlap, reducer, and booth temperature all support the same wet film.
Matching Avalon tools to a profitable shop routine
In a professional shop, tip size also affects workflow. A painter who uses one gun for every material spends more time cleaning, correcting, and adjusting. A smarter routine assigns roles. The A60 eXtreme can serve as the main refinish platform for basecoat, clearcoat, and sealer work. The compact A30 route can handle small parts, touch-ups, tight bumper repairs, and smaller blends without forcing a wide full-size fan into a narrow repair.
A practical paint gun tip size chart inside the shop can be written directly on the mixing-room wall: A60 eXtreme 1.3 mm for controlled base and finer clear, A60 eXtreme 1.4 mm for fuller clear delivery and wider panel work, A-30 Mini 0.8 mm for detail, A-30 Mini 1.0 mm for small panels, and A-30 Mini 1.2 mm for bumper spot repair. That kind of simple internal standard reduces guesswork between jobs.
Painters choosing their first serious setup can also benefit from choosing the first serious gun because tip size only makes sense when the tool itself fits the work. A compact detail gun, a full-size finish gun, and a primer gun each solve a different problem. When the lineup is organized, the painter spends less time forcing compromise into the finish.
AV Spray Guns support for precise Avalon tip selection
At AV Spray Guns, we organize Avalon spray guns around real booth use: full-size refinishing, compact repair, clearcoat flow, basecoat control, and touch-up accuracy. We know a painter looking for a paint gun tip size chart is usually not asking for a generic list. That painter wants to know which setup will help basecoat orient cleanly, which tip will make clear lay flatter, and which compact option will reduce overspray on smaller repair areas.
- Choose Avalon A60 eXtreme 1.3 mm when basecoat control and finer clear texture are the priority.
- Choose Avalon A60 eXtreme 1.4 mm when larger panels, higher fluid delivery, and full clearcoat flow matter more.
- Choose A-30 Mini 0.8 mm for precise touch-up and detail work.
- Choose A-30 Mini 1.0 mm for small panels, mirrors, jambs, and controlled blends.
- Choose A-30 Mini 1.2 mm for bumper spot repair and compact repair coverage.
We help painters match the gun to the work instead of pushing a single setup for every job. The A60 eXtreme family gives professional shops a serious full-size platform for refinish material, while the A30 compact path gives tighter control where a broad fan is not the right answer. When the tip, gun body, cap behavior, and coating all match, the painter gets cleaner atomization, fewer corrections, and a finish that is easier to repeat.